


A beautiful paver patio or driveway is about more than the pavers you see. What sits underneath them (and what fills the joints between them) is what helps the finished surface stay level, drain properly, and look good over time.
Here’s the short answer: Paver base goes underneath your pavers, regular coarse sand creates the thin bedding layer, and polymeric sand fills the joints between pavers at the end. They are not interchangeable, and choosing the right material for the right layer makes a real difference.
Think of it as a team: the gravel base supports the project and helps water drain, bedding sand gives the pavers a level surface to sit on, and polymeric sand helps stabilize the joints. A successful patio needs each layer to do its own job.
The four layers of a paver patio

1. Gravel base: the foundation
Paver base is typically crushed gravel, sometimes sold as crusher run or ¾-inch-minus. It is excavated for, spread in layers, and compacted firmly before the bedding sand or pavers go down.
The base does two important jobs. First, it spreads the load across the ground beneath your pavers. Second, it helps water drain away. Poor drainage can leave water trapped under the pavers; in freezing conditions, that water can expand and push the surface upward, a problem commonly called heaving.
A common rule of thumb is 4–6 inches of compacted gravel base for a patio or walkway and 8–12 inches for a driveway or area where vehicles will park. Soil conditions, climate, expected loads, and local guidance matter, so confirm the appropriate depth for your site before excavating. In freeze-prone areas, the deeper end may be appropriate.
Add the gravel a few inches at a time and compact each layer with a plate compactor. Don’t dump the entire depth in at once and assume a quick pass will do the same job.
2. Bedding sand: the leveling layer
On top of the compacted gravel goes a thin layer - typically about 1 inch - of coarse, washed regular sand. Rake it level with a straight board and leave it loose; do not compact this bedding layer before laying the pavers.
This is the layer the pavers actually sit on. It helps each paver settle into place and makes it possible to create an even surface. It is not polymeric sand: use the appropriate coarse bedding sand here.
3. The pavers: the visible surface
Now the pavers can be laid. Depending on the project, they may be concrete, brick, porcelain, travertine, or another suitable natural stone. Keep the layout consistent and follow the installation requirements for the paver type you have selected.
Once the pavers are in place, install suitable permanent edging around the perimeter. Edging helps hold the field of pavers in position. Without it, pavers can gradually creep outward, the joints can open up, and sand can escape.
4. Joint sand: the finishing touch
After the pavers are laid and the perimeter is secured, sweep joint sand into the gaps between the pavers. This is where polymeric sand belongs.
Polymeric sand is a sand blended with polymer additives. It is swept into the joints dry, then watered according to the product directions. Water activates the polymers, and as the material cures, the joints firm up to help stabilize the paver surface.
Polymeric sand is not a replacement for the gravel base, the bedding layer, or proper edging. It finishes the joints; it cannot rescue a poorly prepared foundation.
Paver base vs. paver sand: why the names get confusing
Retail labels can make this more confusing than it needs to be. The phrase “paver base” may be used for different products, so check what the bag actually contains and what the manufacturer says it is designed to do.
Crushed gravel / structural base: the compacted foundation under the bedding sand; it supports loads and helps drainage.
Bedding sand / leveling sand: the thin layer of loose coarse sand directly under the pavers.
Base panels: rigid plastic or polypropylene panels that may replace a conventional gravel base in certain specialized applications, such as some rooftop decks. Use only a system designed for the project and with adequate drainage.
Polymeric sand / joint sand: the material swept into the gaps between the pavers after installation.
Remember: gravel base, bedding sand, and any suitable base panel system are below the pavers. Polymeric sand goes between them.

What polymeric sand does that regular joint sand can’t
Regular sand can fill a paver joint, but it stays loose. Over time, rain, hose water, and other conditions can wash it out; ants can move it, and gaps left behind can collect seeds and debris. That often means topping up the joints again and again.
Polymeric sand is designed to help address those problems by:
- Stabilizing the joints so the pavers work together as a more unified surface.
- Resisting washout and erosion from rain and routine water exposure when correctly installed.
- Maintaining flexibility to accommodate some movement from seasonal ground changes and freeze-thaw cycling.
- Helping keep joints filled, which reduces the open gaps where debris and seeds can collect.
Polymeric sand is a joint stabilizer, not a weed-control product. Seeds and debris can still land on the surface and take hold, so normal sweeping and maintenance are still part of owning a paver patio.
At a glance: which material goes where?
MATERIAL |
WHERE IT GOES |
MAIN JOB |
Crushed gravel base |
Under the bedding sand |
Supports weight and helps water drain |
Regular coarse bedding sand |
Thin layer directly under the pavers |
Creates a level bed for the pavers to sit on |
Pavers |
Above the bedding layer |
Forms the visible walking or driving surface |
Polymeric sand |
Between the pavers, in the joints |
Hardens after watering to help stabilize joints |
Three mistakes that can undermine a paver project
1. Using polymeric sand under the pavers. Polymeric sand is designed for the joints, not as a base or bedding layer. Use the correct materials in each layer.
2. Adding new polymeric sand over old joint material. Remove existing joint material to a clean depth of at least 1 inch before refilling. The source draft recommends using a powerful pressure washer for removal; work carefully so you do not disturb the bedding sand or base beneath the pavers. Follow product directions and use appropriate protection.
3. Skipping perimeter edging. Without secure edging, pavers can spread outward, widening joints and allowing sand to wash away. Joint sand cannot compensate for a perimeter that is not properly restrained.
One more important rule: do not mix polymeric sand with cement, regular sand, or other materials. Use it directly from the bag as directed by the product label.
Which DOMINATOR® polymeric sand should you choose?
DOMINATOR offers two polymeric sand options. Both are designed to stabilize joints from ⅛ inch to 4 inches wide, with joints at least 1 inch deep. Neither requires compaction, and both are rated for vehicle traffic after 48–72 hours when installed as directed.
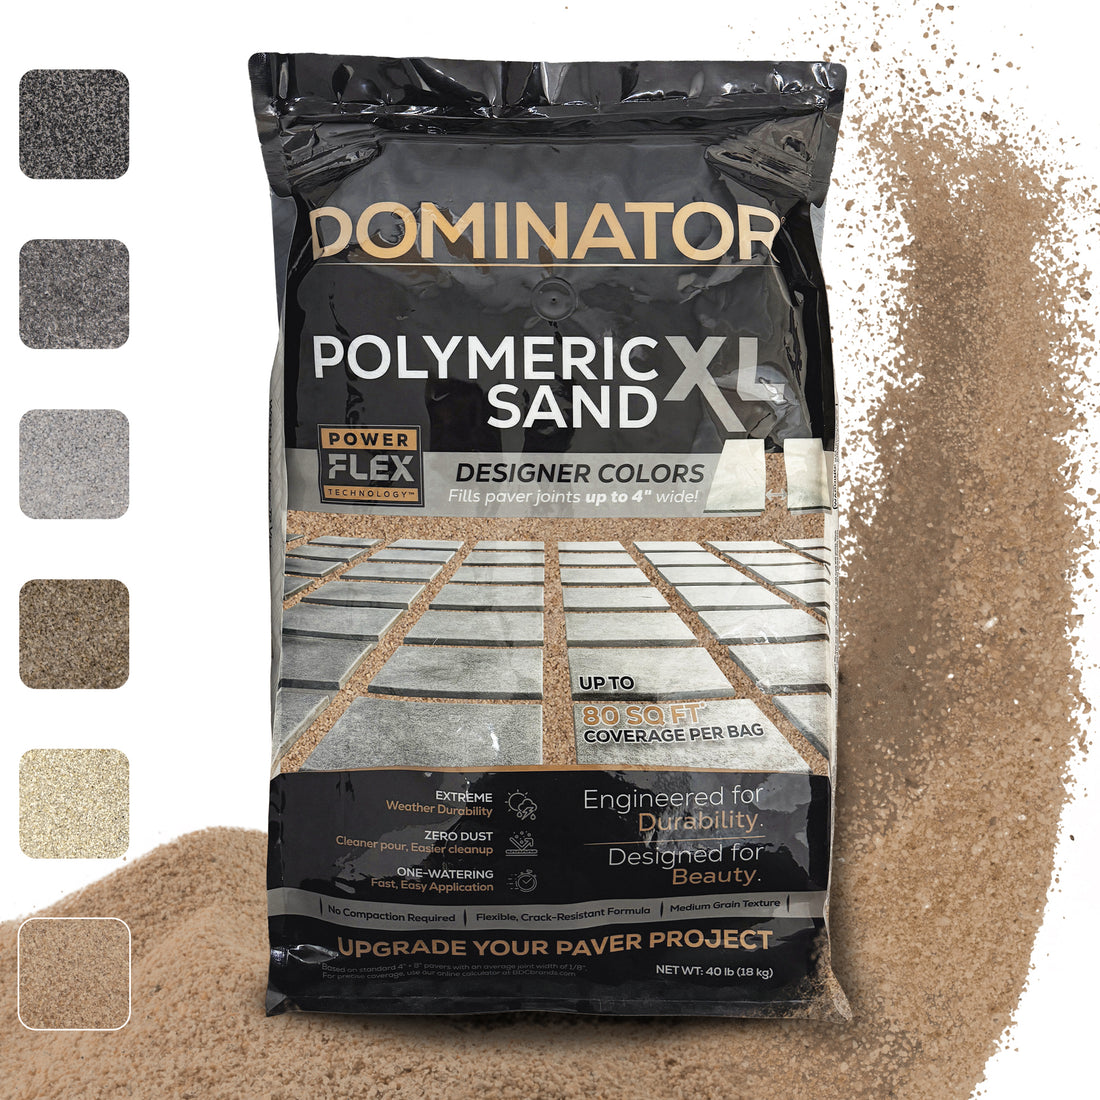
DOMINATOR® XL Polymeric Sand with POWER FLEX Technology
Choose DOMINATOR XL when you want a streamlined installation, particularly for projects where speed and low cleanup are priorities.
- Single watering: one watering activates the product, helping reduce installation time and labor.
- Very low dust and no haze claim: designed to help keep the installation process cleaner and reduce haze on the paver surface when correctly installed.
- Flexible joint performance: POWER FLEX Technology is designed to accommodate paver movement, ground shift, and freeze-thaw cycling.
- Designed for heavy vehicle traffic, including driveways, once the required cure time has passed.
- Available in designer colors to complement the hardscape.
If you have porcelain pavers, keep DOMINATOR XL to non-vehicle areas.
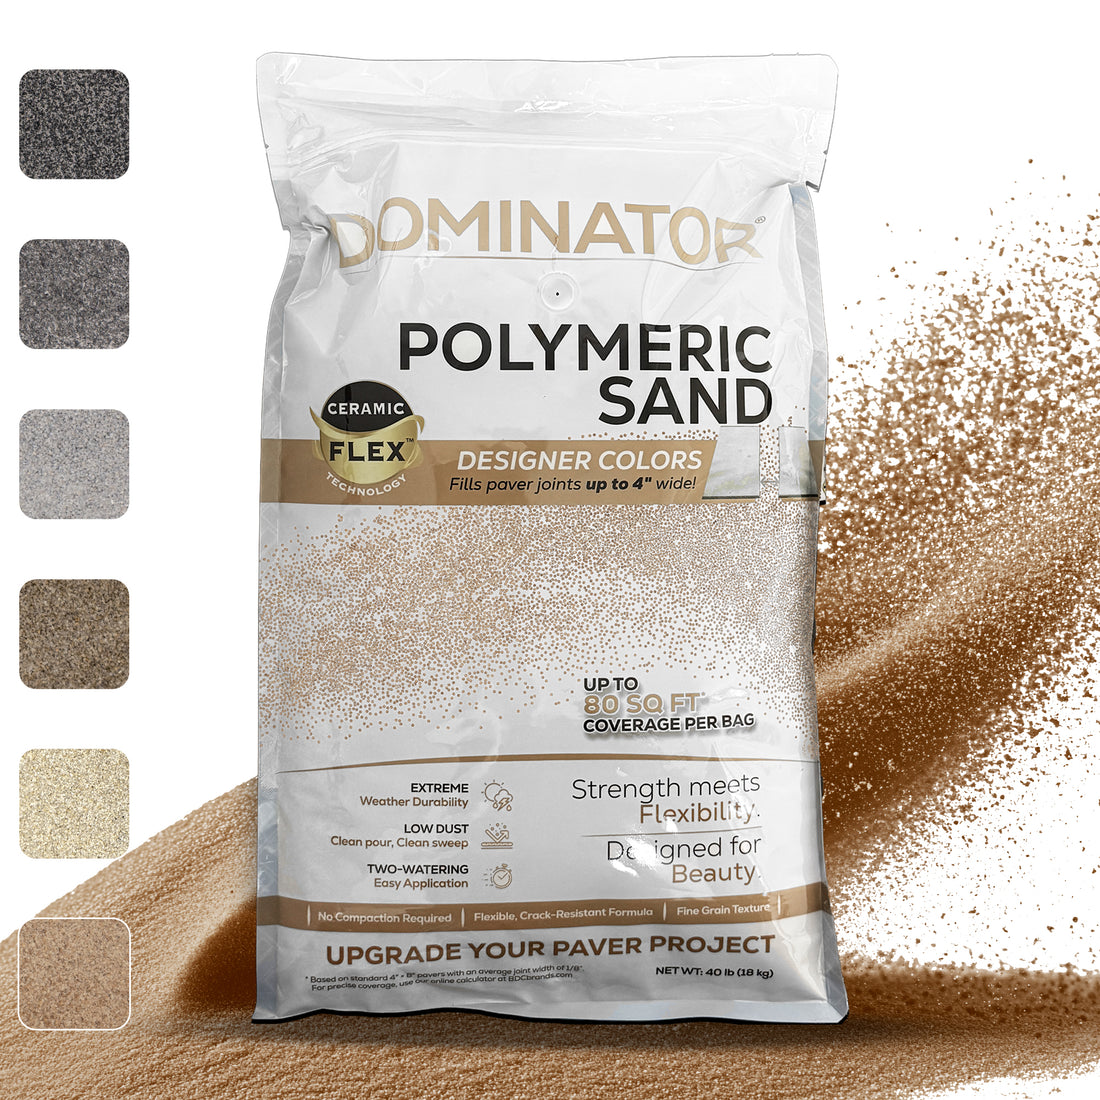
DOMINATOR® Polymeric Sand with Ceramic-Flex
Choose DOMINATOR Polymeric Sand with Ceramic-Flex when bond strength, a smooth, grout-like finish, and a broad selection of colors are priorities.
- Ceramic-Flex technology: designed to provide strong bonding while maintaining flexibility as pavers move.
- Water-repellent performance: designed to resist washout, including in sloped and high-traffic areas when correctly installed.
- UV and heat resistance: helps protect the appearance of the sand color in sunlight.
- Two waterings: the installation process differs from XL, so follow the product directions carefully.
- The source article lists concrete, wet-cast, brick and clay, travertine, and natural stone pavers among the intended surface types; confirm the current package instructions and compatibility for your specific material.
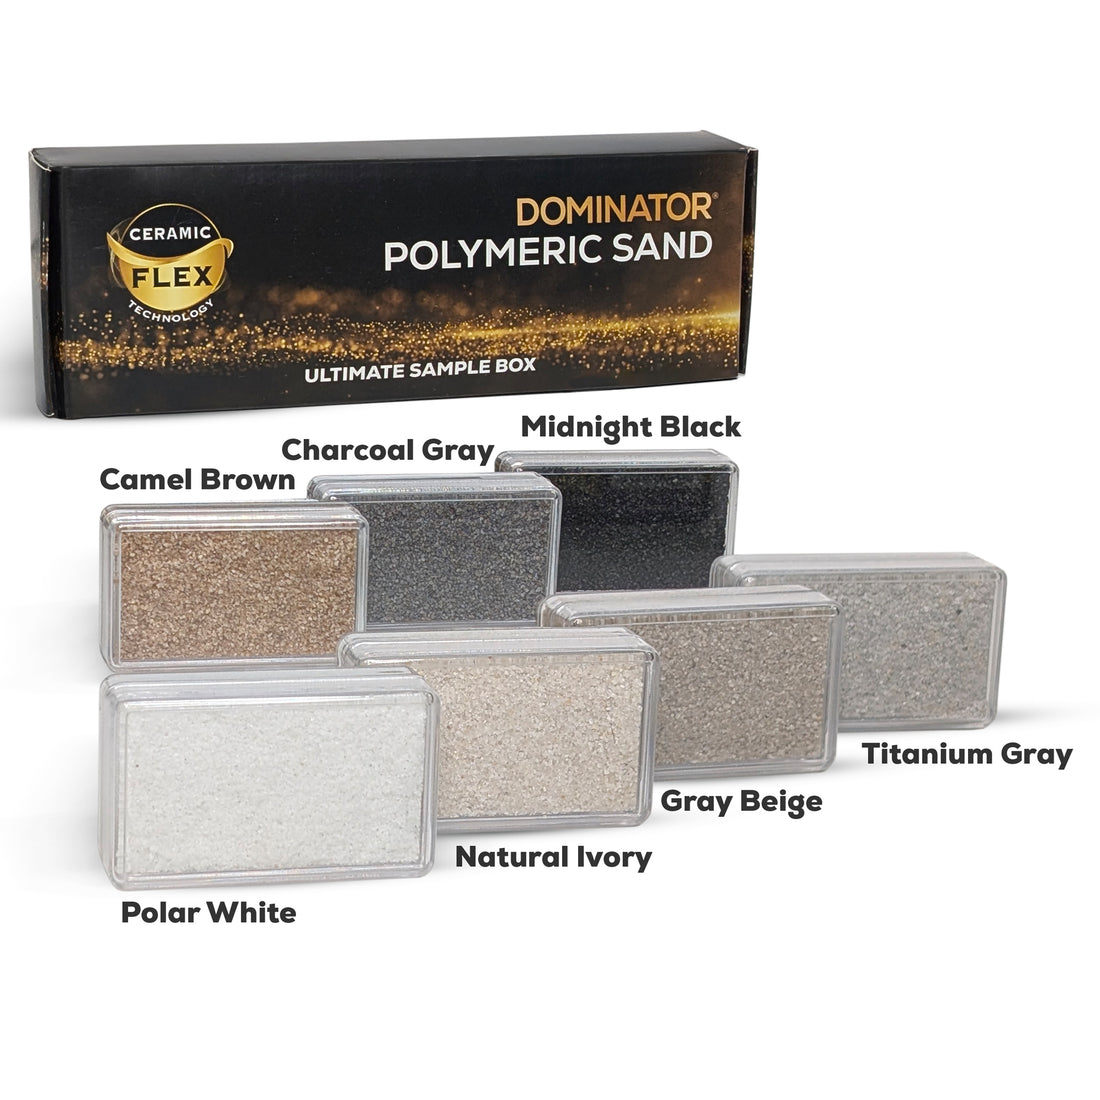
Choosing a color? See the real thing first.
Screens do not show every color accurately, and polymeric sand can look darker when it is first activated before drying to its final shade. Before ordering a large quantity, consider ordering the DOMINATOR sample set and comparing the actual cured color with your pavers in the light where they will be installed.
Click here to order a DOMINATOR color sample set.
Before you open the bag: check the weather and the site
Polymeric sand installation is straightforward when conditions are right, but moisture, temperature, drainage, and joint preparation all matter. Use this checklist before starting and always follow the instructions on your specific product bag.
Temperature: The source article specifies temperatures above 50°F for the 48 hours before installation and 48 hours afterward. Cool weather and high humidity can extend curing time.
Dry pavers: Paver tops and sides should be completely dry. Even morning dew can activate the polymers too early, leaving residue on the paver surface and preventing the sand from settling properly into the joints.
Rain forecast: The source article calls for no rain for 24 hours after installation. Check the forecast before beginning.
Edging: Install permanent perimeter edging. Do not rely on joint sand to hold an unrestrained patio together.
Drainage and slope: Water should drain away from the house and pool. The source article recommends at least ⅛ inch of fall per foot. Do not install where water collects, where the surface stays wet, or where the material will be submerged.
Joint depth and fill: Joints should be at least 1 inch deep and within the product’s approved width range. Fill the joints fully, stopping at least ⅛ inch below the paver surface and below the bottom of the beveled lip, rather than leaving sand flush with the top.
Test patch: Install a small test area of about 9 square feet, allow it to cure, and check the result and color before treating the whole project.
Safety First. Read the safety information on the bag before you start or access our Safety Data Sheet (SDS)

When can you walk or drive on it?
You can walk on the installed joints right away, while vehicle traffic should wait 48–72 hours. If you plan to seal the pavers, wait a full 14 days before cleaning and sealing with a water-based sealer. Store leftover product in a dry place with the bag closed.
How many bags do you need?
Coverage depends on paver dimensions, joint width, and joint depth, so one square-foot estimate will not fit every project. The source article notes that a bag of DOMINATOR XL may cover approximately 20–80 square feet depending on the project.
Use the DOMINATOR polymeric sand calculator for a project-specific estimate before you buy. It can help avoid stopping halfway through the job—or buying more product than you need.
Click here to calculate how much polymeric sand your project needs.
Common questions
Can I use polymeric sand instead of paver base?
No. Paver base is the structural foundation under the pavers; polymeric sand fills the joints between them. They do different jobs, and a typical project needs both.
If I already have a good gravel base, do I still need polymeric sand?
Yes. The base supports the patio and helps drainage. Polymeric sand helps stabilize the joints and resist washout.
Can polymeric sand be used as the leveling layer?
No. Use appropriate coarse, washed bedding sand for the thin layer beneath the pavers. Polymeric sand belongs in the joints.
What is the difference between paver sand and polymeric sand?
Bedding or leveling sand stays loose and sits under the pavers. Polymeric sand contains polymer additives, goes between the pavers, and firms up after watering and curing.
Can regular sand be used in the joints?
Regular sand can fill joints, but it remains loose and is more likely to wash or blow out, be moved by ants, or leave gaps where debris and seeds can collect. Polymeric sand costs more and requires careful installation, but is designed to stabilize the joints.
How deep do joints need to be?
At least 1 inch deep and ⅛ inch to 4 inches wide for both DOMINATOR products. Fill to at least ⅛ inch below the paver surface.
Can I sweep new polymeric sand over old joint sand?
No. Remove old material to at least 1 inch of clean depth before refilling, taking care not to disturb the bedding layer or base.
Does polymeric sand work in freeze-thaw climates?
Both DOMINATOR XL with POWER FLEX and DOMINATOR with Ceramic-Flex are designed to handle expansion and contraction from ground movement and freeze-thaw cycling. Correct installation and drainage remain important.
Will polymeric sand stop weeds?
It is a joint stabilizer, not a weed-control product. Keeping joints filled can reduce open gaps, but seeds and debris can still land on the surface and take hold.
Can I use it around a pool?
Yes when the site has appropriate slope and drainage, including at least ⅛ inch of fall per foot away from the pool edge. It is not intended for areas that remain wet or submerged.
Which DOMINATOR sand should I use for a driveway?
Both are suitable for vehicle traffic after 48–72 hours when installed as directed, and specifically positions XL for heavy vehicle traffic. For porcelain pavers, the article says to use XL only in non-vehicle areas.
The short version: build it right, layer by layer
Take your time with the gravel base, because everything above it depends on a stable, well-drained foundation. Use the right bedding sand to level the pavers, secure the perimeter with suitable edging, and finish the joints with a polymeric sand designed for your project.
The materials work best when each one does its own job. Get the layers right, follow the installation instructions, and you’ll be setting your patio, walkway, or driveway up for a better-looking, longer-lasting result.
START YOUR PROJECT WITH DOMINATOR®
Shop DOMINATOR Polymeric Sand | Calculate Your Coverage | Order a Color Sample Set
Questions about your project? Call 800-270-4050.
About BDC Brands
Black Diamond Coatings, Inc. (BDC Brands) is a veteran- and family-owned manufacturer of premium home improvement products. Its DOMINATOR®, AQUA-X®, and OBSESS® brands are made in the USA and sold through Amazon, Lowe’s, The Home Depot, Walmart, and the company’s own online store. BDC Brands is ISO 9001:2015 certified and headquartered in Brooksville, Florida. Its guiding idea is: “Creating Trustworthy Solutions Beyond Expectations.” Learn more at blackdiamondcoatings.com.