One common question that both DIYer's and contractors alike always want to know is: "How much sealer should I apply?" In this short article, we will teach you "how to be a Paver Whisperer." To better understand the sealing process, you need to understand the variations in the pavers themselves.
There are many paver manufacturers throughout the United States. Each has a unique manufacturing process and raw materials. As a result, the final product (pavers) will vary in different ways. Each company's pavers will have unique colors, shapes, styles and varying degrees of quality.
Step 1: Determine the porosity of the pavers
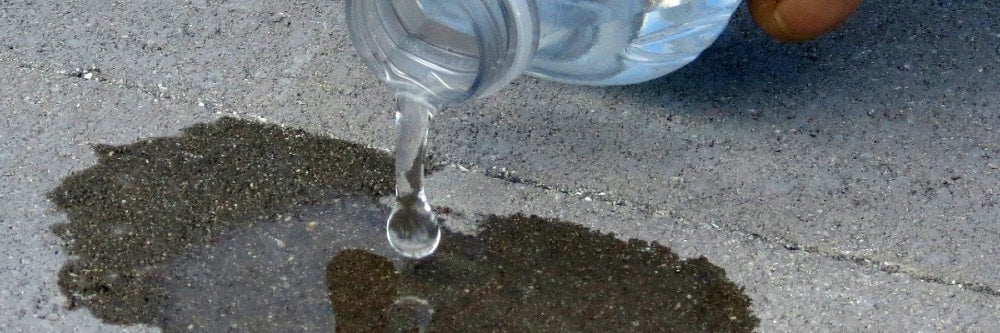
The porosity and density of the paver is important. Think of this as the "sponge factor." The more porous the paver, the more liquid or sealer it will absorb. The first step in becoming a "Paver Whisperer" is determining the porosity of the paver from the start of the project.
Generally, the densest surfaces are natural surfaces like stone and clay. They don't accept much liquid because they are typically not very porous. One of the newer paver manufacturing processes, wet cast pavers, tend to act more like natural stone. Concrete pavers are made with sand, concrete, aggregate and pigments. Depending on the product mix, you can get varying degrees of porosity.
You need to understand the porosity of your pavers before you purchase sealer so you get the appropriate product and amount for the job. One thing to look for is the speed at which the paver dries. Very dense pavers are less porous and will generally dry very quickly because they don't absorb a lot of water during the cleaning process. However, if you notice during the cleaning process that the water is rapidly soaking into the pavers, and they need an extended dry time, this is a good sign that you are dealing with more porous pavers and should adjust your sealer needs accordingly.
Check out our Porosity Test video for how to quickly understand whether your pavers are more porous or denser.
Step 2: Choose the Correct Sealer and Application Method
We have not found a one size fits all sealer for every paver surface. Instead, you need to choose the sealer that is both correct for the surface and for the homeowner's preferences.
When researching sealer products, make sure you understand the manufacturer's stated coverage rates. This is important so you don't purchase too much or too little sealer for the project. Too much sealer, and you either waste it or risk over-applying. Too little sealer, and you end up with a partially finished project while waiting to get the additional project. It can be difficult to blend in sealer so it's far better to do your homework up front.
Check out this handy chart comparing finishes and appropriate surfaces for each of Black Diamond Coatings' products:

Once selected, now you begin the sealing.
One common scenario is applying sealer to newly installed pavers. You have already determined the porosity of the pavers using your newly acquired Paver Whisperer skills from Step 1. You are now ready to apply the first coat of sealer. Whether your pavers are porous or dense, the first step in the process is the same.
Apply the first coat of your selected Black Diamond Coating product to the surface. The proper application is to completely cover the surface of the paver without any pooling of the product. The surface should be completely white without "flooding" it on, observing the coverage rates by product. We recommend spraying the sealer on for easier installation and less risk of getting lines, which tend to occur when rolling sealer on. Any product puddles should be back-rolled with the appropriate nap roller, even if you are spraying the sealer on the surface.
The deeper the surface, the higher the nap roller you will need (generally a 3/8"-3/4" nap is sufficient). This application will allow sufficient product to get into the paver joint for proper stabilization.
Additionally, we recommend applying a texture additive such as Diamond Grit in the final coat to increase traction on particularly smooth surfaces or areas prone to slipping, like pool decks, sloped areas or stairs.
Step 3: Assess how quickly the Sealer is Absorbing
The third step to becoming a Paver Whisperer is the ability to assess how the product is absorbing into the paver surface. If the surface stays white for 30-45 minutes (in direct sunlight), the paver is telling you that you have applied the proper amount of sealer and that no additional coats are necessary. If the "white" appearance of the initial sealer application disappears within 1-3 minutes (in direct sunlight), the paver is telling you that it is thirsty and that an additional coat is necessary.
Now that you know you will certainly need to apply an additional coat, wait 30-45 minutes after the initial coat to allow the product to properly absorb into the paver. After the initial application, the subsequent applications will generally be applied in thinner coats. Again, pay close attention to how the sealer absorbs into the paver. If after the second application (which is applied lighter than the initial), the "white" appearance of the product disappears within 5-10 minutes, this is a good indication the paver is still thirsty and may require a third application. If you find that a third application is required, it should also be applied as a thin coat.
Summary
Congratulations!! You now have all the skills necessary to be a Paver Whisper. The paver will always tell you how much sealer it wants. Trying to apply the same amount of sealer to each and every job will often result in too much sealer in some cases and not enough sealer in others. Use these skills wisely and you will be ahead of your competition.